Installation of 64 bits ODBC Oracle client (to work with Office 64Bits)
Here’s the solution.
My operating system is Windows 7 64-bit, using Office 2010 64-bit. Trying to connect to an ODBC data source through Excel. The data source is an Oracle9i 32-bit database on a Windows Server 2003 32-bit server. However, the database version or server operating system is arbitrary; it could be an 8i, 9i, 10g, or even an 11g 32-bit or 64-bit database on a UNIX or Windows server. If you’re using Windows 7 64-bit and you want to connect to an ODBC data source through Excel to an Oracle database, you must use Office 2010 64-bit. You cannot use Office 2003 or 2007, for example.
Follow these steps on your Windows 7 64-bit PC to connect to your ODBC data source.
1. Through Oracle’s web site, go to Instant Client Downloads for Microsoft Windows (x64). Currently, the address to that page is:
http://www.oracle.com/technology/software/tech/oci/instantclient/htdocs/winx64soft.html
2. Download the two following files, found under the version 11.1.0.7.0 heading:
Instant Client Package – Basic (instantclient-basic-win-x86-64-11.1.0.7.0.zip)
Instant Client Package – ODBC (instantclient-odbc-win-x86-64-11.1.0.7.0.zip)
3. Extract both zip files to the same directory (such as c:\oracle\instantclient_11_1).
4. Copy your previous files TNSNAMES.ORA end SQLNET.ORA in this new folder
5. Launch the Command Prompt (DOS command window) by running it as administrator. Go to Start > All Programs > Accessories, then right click Command Prompt and select Run as Administrator.
6. From within the Command Prompt, navigate to c:\oracle\instantclient_11_1, and run odbc_install.exe. You should receive a message saying Oracle ODBC Driver is installed successfully. The name of the new ODBC driver that was just installed is Oracle in instantclient11_1 — use this driver when creating your ODBC connection.
7. Create a new system environment variable. Set the value of the variable name as TNS_ADMIN, and the value of the variable path as the directory that contains the tnsnames.ora and sqlnet.ora files. On my PC, I have another Oracle client already installed which has its own tnsnames.ora and sqlnet.ora files. Therefore, I set the value of variable path as c:\orant\net80\admin (the directory that contains my tnsnames.ora and sqlnet.ora files). If you don’t have another Oracle client installed on your PC, create a new directory such as c:\oracle\instantclient_11_1\network\admin, and place the tnsnames.ora and sqlnet.ora files in that directory. Then, set c:\oracle\instantclient_11_1\network\admin as the value for the variable path.
8. To create the ODBC connection, go Start > Control Panel > Administrative Tools > Data Sources (ODBC). Alternatively, you can create the connection right from within Excel.
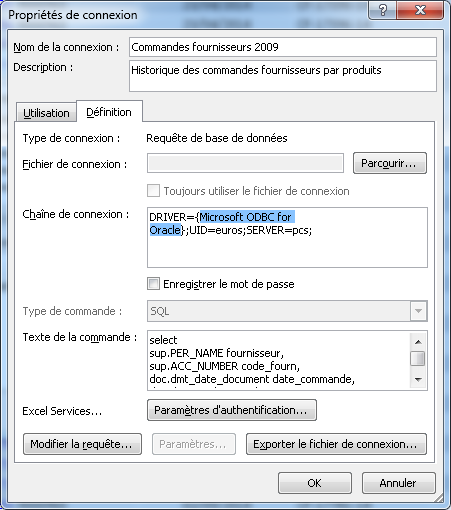
Then you can have another problem: Your users already have EXCEL files with a driver named for example : “Microsoft ODBC for Oracle”.
Oracle in instantclient10_2 is set by odbc_install.exe and can be altered if you change the registry:
1. In HKEY_LOCAL_MACHINE\SOFTWARE\ODBC\ODBCINST.INI\ODBC Drivers, change the name of “Oracle in instantclient10_2” to whatever you want.
2. Rename the, “Oracle in instantclient10_2” key in HKEY_LOCAL_MACHINE\SOFTWARE\ODBC\ODBCINST.INI to the same name you used above.


